How to Make Butter at Home: Homemade Butter from Cream
9 min read
Butter is one of the easiest dairy products you can make at home. It has one ingredient, cream, and needs no special equipment. If you have ever whipped cream for a little too long, you have already started making butter without meaning to.
This guide is for home kitchens. It explains which cream to buy, how warm it should be, what you will see in the bowl, and how to wash, salt and store the butter so it tastes fresh for weeks instead of days.
What you need
For about 200 g (7 oz) of butter, a little under 1 cup:
- 2 cups (475 ml) heavy cream or heavy whipping cream
- Ice water, about 4 cups (1 liter)
- Fine salt (optional), about ¼ teaspoon per 100 g (3½ oz) of butter
Equipment (pick one):
- A stand mixer with the whisk, or a hand mixer and a deep bowl
- A food processor
- A clean glass jar with a tight lid, filled no more than halfway
You will also need a fine sieve or a piece of cheesecloth, a spatula or wooden spoon, and a clean container for the buttermilk.
Choosing the cream
Butter is the fat in cream gathered into one mass, so the more fat the cream has, the more butter you get.
- Use heavy cream or heavy whipping cream. In the United States these must contain at least 36% fat. “Whipping cream” (30–36%) works but gives less butter. Light cream, half-and-half and milk will not turn into butter in a home kitchen.
- Ultra-pasteurized cream works, it just takes a few minutes longer and the butter tastes a little flatter. If you can find cream that is only pasteurized, choose it.
- Fewer additives is better. Some creams contain gums such as carrageenan to keep them thick. They can slow the butter down. It will still form, so keep going.
- Use pasteurized cream. Raw cream carries a real food safety risk, and homemade butter is eaten without cooking. If you want to know why, read our guide to what pasteurization does.
Fresher cream makes better butter. Check the date and use it well before it expires. To see why fat content changes flavor and texture so much, read how milk fat shapes dairy products.
The right temperature
Temperature matters more than anything else in this recipe.
- Best: 50–60 °F (10–15 °C). Take the cream out of the refrigerator about 20 to 30 minutes before you start. It should feel cool, not cold.
- Too cold (straight from the fridge): the fat is hard and the cream may take 20 minutes or more to turn.
- Too warm (above about 70 °F / 21 °C): the butter forms quickly but is soft and greasy, and more fat is lost in the buttermilk.
On a hot day, chill the mixer bowl for 10 minutes before you start.
Step by step: from cream to butter
1. Whip the cream
Pour the cream into the bowl and start on medium speed, then raise it to medium-high. Cover the top of the bowl with a clean towel or plastic wrap, because the buttermilk will splash later. In a food processor, simply run the machine. In a jar, close the lid tight and shake hard.
2. Watch the stages
You will see the cream change in this order:
- Foamy: bubbles on the surface, still liquid.
- Soft whipped cream: soft peaks that fold over.
- Stiff whipped cream: firm peaks. Most people stop here. Keep going.
- Grainy and pale yellow: the cream looks rough and slightly curdled.
- The break: all of a sudden the fat clumps together and a thin, milky liquid splashes out. That liquid is the buttermilk, and the yellow clumps are your butter.
With a stand mixer this takes about 5 to 10 minutes, with a food processor 2 to 4 minutes, and with a jar 10 to 20 minutes of steady shaking. When it breaks, turn the mixer down to low for a few seconds so the clumps gather into one mass, then stop.
3. Drain the buttermilk
Pour everything through a sieve set over a bowl. Keep the liquid; it is real buttermilk and you can cook with it (see below).
4. Wash the butter
This is the step that decides how long your butter will last. Any buttermilk left inside the butter will turn it sour within a few days.
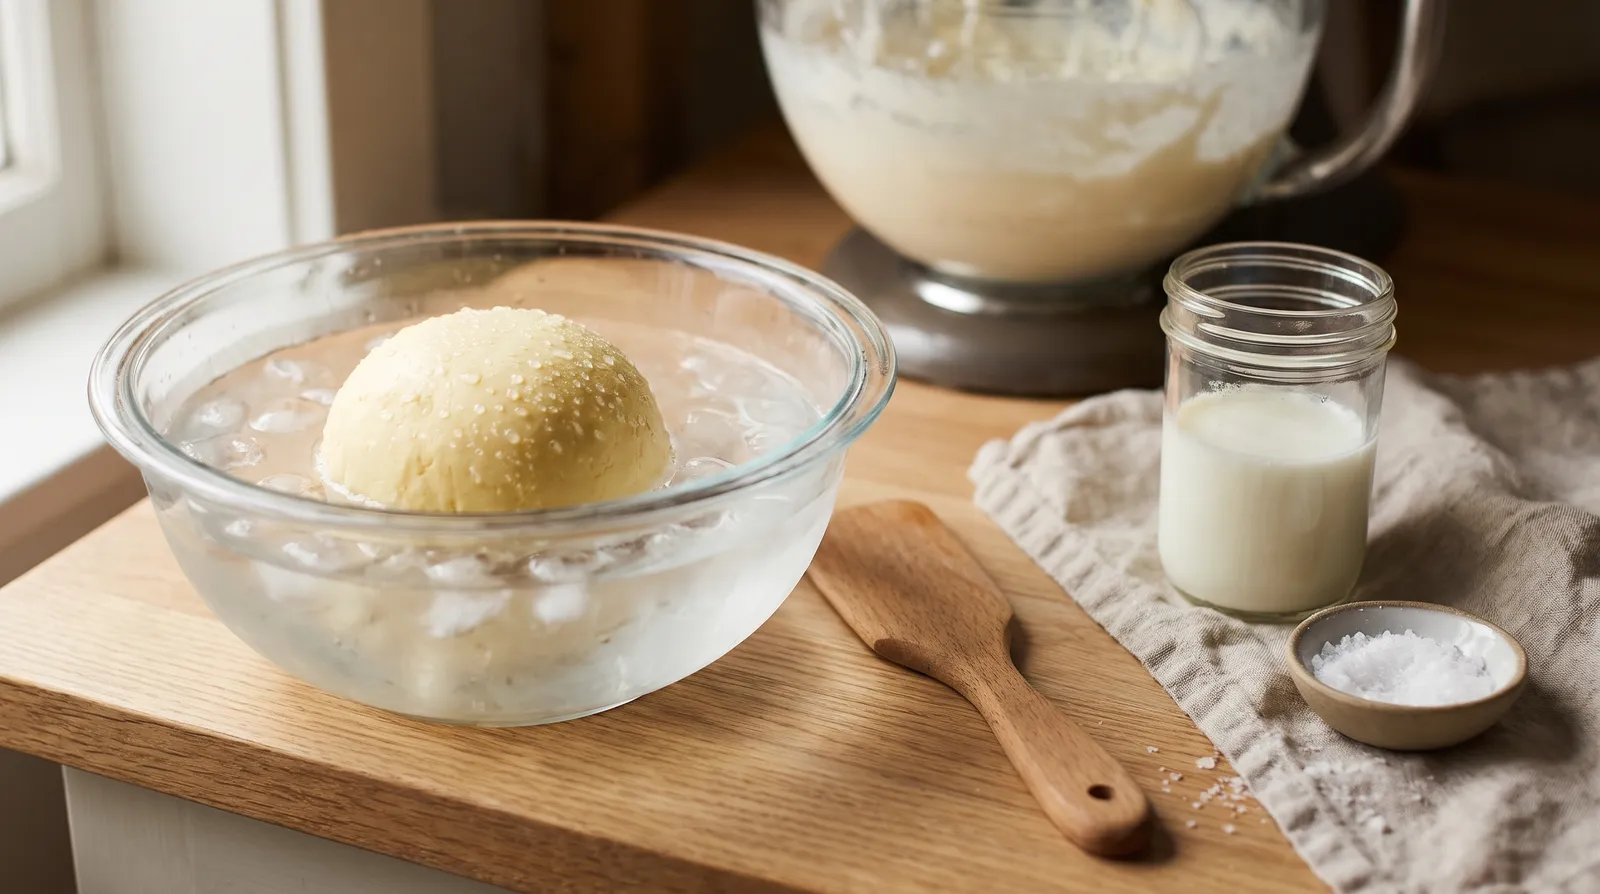
- Put the butter back in the bowl and pour over about 1 cup (250 ml) of ice water.
- Press and fold the butter with a spatula or wooden spoon so the water flows through it. The water will turn cloudy.
- Pour off the water and repeat with fresh ice water.
Usually 3 or 4 rinses are enough. Stop when the water stays almost clear. Then press the butter firmly against the side of the bowl to squeeze out as much water as you can.
5. Salt (optional)
Unsalted butter is fine for baking. For spreading, most people prefer it salted. Sprinkle about ¼ teaspoon of fine salt per 100 g (3½ oz) of butter, which is about 1.5% by weight, and work it in evenly. Taste and add more if you like. Salt also helps the butter keep a little longer.
6. Shape and chill
Pack the butter into a small dish or ramekin, or roll it into a log in parchment paper. Chill it for an hour before using so it firms up.
How much butter you get
Each cup of heavy cream gives roughly 100 g (3½ oz) of butter and a little under ½ cup of buttermilk. The exact amount depends on the fat content of your cream and on how much water you press out.
| Heavy cream (36%) | Butter, approximately | Buttermilk, approximately |
|---|---|---|
| 1 cup (240 ml) | 100 g (3½ oz) | ½ cup (110 ml) |
| 2 cups (475 ml) | 200 g (7 oz) | 1 cup (230 ml) |
| 1 quart (950 ml) | 400 g (14 oz) | 2 cups (460 ml) |
When something goes wrong
- It has been whipping for ages and nothing happens. The cream is probably too cold, or it is ultra-pasteurized. Let the bowl sit at room temperature for 10 minutes, then try again. It will break.
- The butter is soft, greasy or smeary. The cream or your kitchen is too warm. Put the bowl in the refrigerator for 15 minutes before you wash the butter, and use the coldest water you can.
- The butter tastes sour after a few days. It was not washed enough. Next time, rinse until the water stays clear.
- There are water droplets in the butter. Press it longer against the side of the bowl, or knead it with a spatula on a cold plate.
- It never turns into butter at all. Check the label: cream below 30% fat, or a “whipped topping”, will not work.
What to do with the buttermilk
The liquid left after churning is the original buttermilk. It is thin, mild and slightly sweet, unlike the thick, sour cultured buttermilk sold in stores. Use it within 2 or 3 days in:
- pancakes, waffles, scones and biscuits
- bread dough instead of milk or water
- smoothies, or soaking oats overnight
Recipes that rely on store-bought buttermilk’s acidity to activate baking soda need that sourness. Stir 1 tablespoon of lemon juice or vinegar into each cup, wait 5 minutes, and use it as you would cultured buttermilk.
Cultured butter: a little more flavor
European-style butter tastes richer because the cream is fermented before churning. You can do the same at home:
- Stir 2 tablespoons of plain yogurt with live cultures (or store-bought cultured buttermilk) into 2 cups (475 ml) of cream.
- Cover the jar loosely and leave it at room temperature, about 68–75 °F (20–24 °C), for 12 to 24 hours, until it is slightly thick and smells pleasantly tangy.
- Chill it to about 55 °F (13 °C), then churn, wash and salt it exactly as above.
The bacteria that do this work are the same kind used in yogurt and cheese. Our beginner’s guide to cultures explains how they work, and if you enjoy fermenting at home, try making Greek yogurt next.
Storing homemade butter
- Refrigerator: well-washed unsalted butter keeps about 1 week, salted butter up to 2 or 3 weeks. Wrap it tightly or keep it in a closed container, because butter absorbs the smells around it.
- Freezer: wrap it in parchment and then in foil or a freezer bag. It keeps for up to 6 months. Thaw it in the refrigerator.
- On the counter: only salted butter, only a small amount, in a covered butter dish in a cool room, and only for a few days.
- Flavored butter (herbs, garlic, honey): keep it in the refrigerator and use it within a week, or freeze it in portions.
Frequently asked questions
Is homemade butter better than store-bought?
It is fresher, and you control the cream and the salt. Nutritionally it is about the same: butter is butter. The main differences are flavor and the satisfaction of making it yourself. It usually costs about the same or a little more than good store-bought butter.
How long does homemade butter last?
About 1 week in the refrigerator if unsalted, 2 to 3 weeks if salted and well washed, and up to 6 months in the freezer.
Can I make butter from milk?
Not directly. Whole milk has only about 3–4% fat. You would first need to separate the cream, which is easy with fresh, non-homogenized milk left to stand in the refrigerator overnight, but store-bought milk is homogenized and the cream will not rise.
Do I have to wash the butter?
If you will eat it within a day or two, you can skip it. Otherwise, wash it: leftover buttermilk is what makes homemade butter go sour quickly.
Why is my butter so pale?
Butter color comes from the cow’s diet. Cream from grass-fed cows, especially in spring and summer, makes yellower butter. Pale butter is perfectly normal.
Looking for more? Browse all our butter guides or other dairy products you can make at home.
Get new guides by email
One short email when we publish something new. No spam.