
Step-by-Step Production of Fresh Cheese Curds: Mastering Every Stage
Fresh cheese curds epitomize the delicate balance between dairy science and artisanal tradition. For professionals aiming to perfect their curd production, understanding each phase is non-negotiable. With precision, knowledge, and the right environment, your curds can achieve superior quality, consistency, and a squeaky reputation your brand deserves.
Step-by-Step Process to Produce Fresh Cheese Curds
Step 1: Choose the Right Milk
Source high-quality cow’s milk — raw (with strict controls) or pasteurized.
Ensure freshness: Milk should be less than 24 hours old for best curd elasticity.
Test for contaminants: Antibiotic and microbial screens must be performed before processing.
Step 2: Standardize Milk Composition
Adjust fat and protein to optimal levels (3.2%–3.6% fat, 3.0%–3.5% protein).
Why? Consistent solids ensure uniform curd firmness and yield.
Step 3: Pasteurize the Milk
Options:
Low-Temperature Long-Time (LTLT): 63°C for 30 minutes
High-Temperature Short-Time (HTST): 72°C for 15 seconds
Objective: Eliminate pathogens while preserving milk proteins for cheesemaking.
Step 4: Cool to Inoculation Temperature
Cool rapidly to about 30°C (86°F).
Use plate coolers or jacketed vats for precision.
Step 5: Add Starter Cultures
Introduce mesophilic cultures (e.g., Lactococcus lactis strains).
Dosage: Typically 0.5–1% of milk volume.
Goal: Acidify milk gradually for proper curd formation and flavor.
Step 6: Add Calcium Chloride (if needed)
Dosage: 0.02–0.03% (20–30 mL per 100 liters of milk).
Purpose: Recalibrate mineral balance post-pasteurization to ensure firm coagulation.
Step 7: Add Rennet
Dosage: According to manufacturer’s specifications, typically 0.02%.
Action: Rennet cleaves casein proteins, forming the curd matrix.
Wait: Allow coagulation until “clean break” (~30–40 minutes).
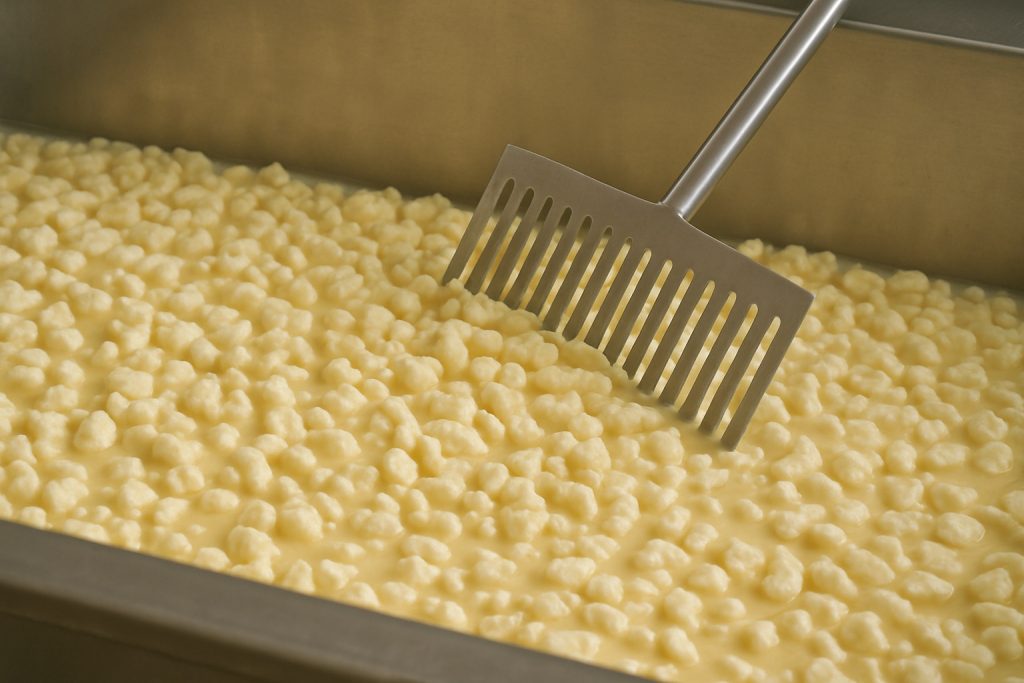
Step 8: Cut the Curd
Tools: Stainless steel curd knives.
Method: Cut into 0.5-inch cubes evenly.
Importance: Controls whey expulsion and final moisture content.
Step 9: Stir and Expel Whey
Gently stir to prevent curd clumping.
Gradually increase stirring intensity as curds firm.
Why? Prevents mechanical damage and uneven texture.
Step 10: Heat and Cook the Curd
Ramp temperature to 39°C (102°F) at a rate of 1°C every 5 minutes.
Cook for 30–45 minutes, stirring gently.
Goal: Syneresis — proper whey expulsion and curd contraction.
Step 11: Drain the Whey
Separate whey completely without compacting curds.
Use perforated tables, cheese screens, or draining bags.
Step 12: Optional Cheddaring
Cheddaring involves stacking curd slabs and flipping every 10–15 minutes.
Why? Further whey drainage and texture development.
Step 13: Mill and Salt the Curds
Mill slabs into bite-sized curds.
Add salt (1–2% by weight).
Effect: Flavor development, moisture regulation, and pathogen control.
Step 14: Cool Curds Properly
Target temperature: Below 7°C (45°F) before packaging.
Cooling options: Forced-air cooling or jacketed curd tanks.
Step 15: Prevent Curds from Sticking Together
Fresh cheese curds have a natural tendency to clump after packaging if preventative measures are not taken. Here’s what to do:
Ensure thorough whey removal: Dry surfaces minimize adhesion.
Rest curds for 5–10 minutes after final cooling to allow slight surface setting.
Optional: Lightly mist with food-grade mineral oil or sprinkle food-grade anti-stick powder like microcrystalline cellulose.
Light salt dusting: Adds a moisture-absorbing layer.
Package loosely: Avoid compressing curds into tight containers.
Use breathable, moisture-managed packaging: Vented polypropylene films are ideal.
Following these critical steps dramatically reduces clumping and maintains a premium presentation.
Step 16: Packaging and Storage
Use sanitized equipment and packaging.
Seal immediately under hygienic conditions.
Store at 1–4°C (34–39°F) for optimal shelf life and squeak retention.
Critical Microbial and Sensory Quality Control
pH Target: 5.2–5.4 for perfect curds.
Monitor for pathogens (Listeria, Salmonella).
Check texture and flavor daily during shelf life studies.
Troubleshooting Common Fresh Curd Issues
| Problem | Cause | Solution |
|---|---|---|
| Bitterness | Excess proteolysis | Adjust rennet and ripening time |
| Tough curds | Overcooking | Reduce cooking time or final temperature |
| Sticky curds | Excess moisture or improper cooling | Improve draining and post-cooling steps |
Frequently Asked Questions
Why do curds lose their squeak after a few days?
Loss of moisture and protein matrix degradation cause squeak reduction; correct cooling and packaging techniques prolong squeakiness.
Can I use vegetable rennet for fresh curds?
Yes, but monitor clotting strength as vegetable rennet may vary compared to traditional animal-derived rennet.
Is dry salting or whey salting better?
Dry salting post-drainage provides more consistent salt absorption and better microbial control.
How do I prevent mold growth on packaged curds?
Sanitize packaging environments and store curds at <4°C; use high-barrier breathable packaging.
What is the ideal shelf life for fresh curds?
Optimally 7–14 days when stored at correct temperatures with proper packaging.
Conclusion
Mastering each micro-step of fresh cheese curd production elevates your craft from good to elite. Precision, control, and a commitment to best practices ensure your curds stand apart in a competitive marketplace. DairyCraftPro stands ready to empower your dairy operation to new heights, providing tools, guidance, and expertise at every phase of your journey.
References
Kosikowski, F. V., & Mistry, V. V. (1997). Cheese and Fermented Milk Foods (Vol. 1). F.V. Kosikowski LLC.
Fox, P. F., Guinee, T. P., Cogan, T. M., & McSweeney, P. L. H. (2000). Fundamentals of Cheese Science. Aspen Publishers.
Walstra, P., Wouters, J. T. M., & Geurts, T. J. (2006). Dairy Science and Technology. CRC Press.
Johnson, M. E., & Lucey, J. A. (2006). “Major Technological Advances and Trends in Cheese,” Journal of Dairy Science, 89(4), 1174–1178.